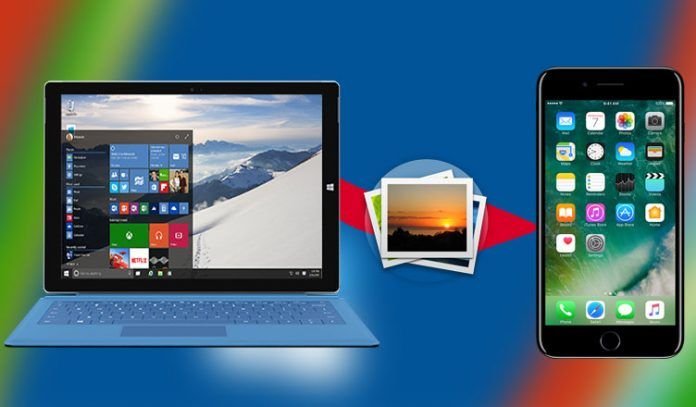
How to Transfer Photos from iPhone to PC
Complete Guide
Transferring photos from your iPhone to your PC doesn’t have to be complicated. Whether you have hundreds of vacation photos or just a few important images, this comprehensive guide will show you multiple methods to move your pictures safely and efficiently.
Method 1: USB Cable Transfer (Fastest for Large Collections)

This traditional method remains one of the most reliable ways to transfer photos, especially when dealing with large photo libraries.
Step-by-Step Instructions:
Connect your iPhone to your PC using a Lightning to USB cable. When your iPhone displays a “Trust This Computer?” prompt, tap “Trust” and enter your passcode if required. On your Windows PC, open File Explorer by pressing Windows key + E. Look for your iPhone under “This PC” or in the left sidebar under “Devices and drives.” Click on your iPhone, then navigate to Internal Storage and open the DCIM folder. Here you’ll find all your photos organized in subfolders. Simply select the photos you want, right-click, and choose “Copy.” Navigate to your desired destination folder on your PC and paste the photos.
Pro Tips:
You can select multiple photos by holding Ctrl while clicking individual images, or select all photos in a folder by pressing Ctrl + A. This method works without requiring any internet connection, making it perfect for travelers or those with limited data plans.
Method 2: Windows Photos App (User-Friendly Option)
The built-in Photos app in Windows 10 and 11 offers a streamlined importing experience with an intuitive interface.

How to Use It:
After connecting your iPhone via USB cable and trusting the computer, open the Photos app on your Windows PC. Click the “Import” button located in the top-right corner of the window. The app will automatically detect your iPhone and scan for new photos. You can choose to import all new items or click “Select items to import” to handpick specific photos. Choose your destination folder and click “Import.” The Photos app will copy your selected images to your PC while keeping the originals on your iPhone.
Advantages:
This method automatically organizes imported photos by date and removes duplicates, saving you time on manual organization. It also remembers which photos you’ve already imported, preventing duplicate transfers.
Method 3: iCloud Photos (Wireless Sync)
For users who prefer wireless solutions and want their photos available across all devices, iCloud Photos offers seamless synchronization.

Setup Process:
On your iPhone, navigate to Settings, tap your name at the top, select iCloud, then Photos, and toggle on “iCloud Photos.” On your Windows PC, download and install iCloud for Windows from the Microsoft Store or Apple’s website. Launch the iCloud app and sign in with the same Apple ID you use on your iPhone. Check the box next to “Photos” and click “Options” to customize your settings. You can choose to download new photos and videos to your PC automatically.
Important Considerations:
iCloud offers 5GB of free storage, which may fill up quickly if you have many photos. You can purchase additional storage starting at affordable monthly rates. Photos sync automatically when both devices are connected to Wi-Fi, making this ideal for ongoing backup rather than one-time transfers.
Method 4: Cloud Storage Services (Flexible Alternative)
Third-party cloud services provide versatile options for photo management across different platforms and devices.
Popular Options:
Google Photos offers unlimited storage for compressed photos and generous free storage for original quality images. Install the Google Photos app on your iPhone, upload your photos, then access them through a web browser or desktop app on your PC. Dropbox provides seamless file syncing with folder-based organization. Microsoft OneDrive integrates perfectly with Windows and offers automatic camera uploads from your iPhone.
Best Practices:
Enable automatic upload only when connected to Wi-Fi to avoid using mobile data. These services work excellently for sharing photos with others and creating automatic backups.
Method 5: Email and Messaging (Quick Transfers)
For transferring just a few photos quickly, email or messaging apps provide the simplest solution.
When to Use This Method:
This approach works best for one to ten photos that you need immediately. Simply open the Photos app on your iPhone, select the images, tap the share button, and choose Mail or any messaging app. Send the photos to yourself and download them on your PC. While convenient for small batches, this method isn’t practical for large photo libraries due to attachment size limitations.
Method 6: AirDrop to Mac (For Mac Users)
If you’re transferring to a Mac instead of a Windows PC, AirDrop provides the fastest wireless transfer method.
Quick Steps:
Ensure both your iPhone and Mac have Wi-Fi and Bluetooth enabled. On your Mac, open Finder and click “AirDrop” in the sidebar. Set your AirDrop visibility to “Everyone” or “Contacts Only.” On your iPhone, select photos, tap the share icon, select AirDrop, and choose your Mac from the list. Photos transfer almost instantly without cables or internet connection.
Troubleshooting Common Issues
iPhone Not Recognized: Try a different USB cable or port, restart both devices, or update iTunes on your PC even if you don’t use it. The drivers it installs help Windows recognize your iPhone.
Photos Won’t Import: Ensure your iPhone is unlocked during transfer. If photos appear as HEIC files, you can convert them using free online converters or change iPhone settings to capture in JPEG format (Settings > Camera > Formats > Most Compatible).
Slow Transfer Speeds: USB cable transfers are fastest. Wireless methods depend on internet speed and file sizes. For very large libraries, consider transferring in smaller batches.
Choosing the Best Method for Your Needs
Select your transfer method based on your specific situation. Use USB cable transfer for moving entire photo libraries quickly, especially when switching to a new phone. Choose iCloud Photos if you want automatic ongoing sync and access photos across all devices. Opt for cloud storage services when you need cross-platform compatibility and sharing capabilities. Pick the Photos app for occasional imports with automatic organization. Use email or messaging for emergencies when you need just a few photos immediately.
Final Thoughts
Transferring photos from iPhone to PC is straightforward once you understand your options. Whether you prefer the speed and reliability of a wired connection or the convenience of wireless sync, there’s a method that fits your workflow. Regular photo transfers not only free up space on your iPhone but also ensure your precious memories are safely backed up in multiple locations. Choose the method that best matches your technical comfort level and photo management needs, and make it a regular habit to protect your valuable photos.